

Sunday, 18 March 2012

Friday, 17 February 2012
Gluten Free Anniversary Cupcakes


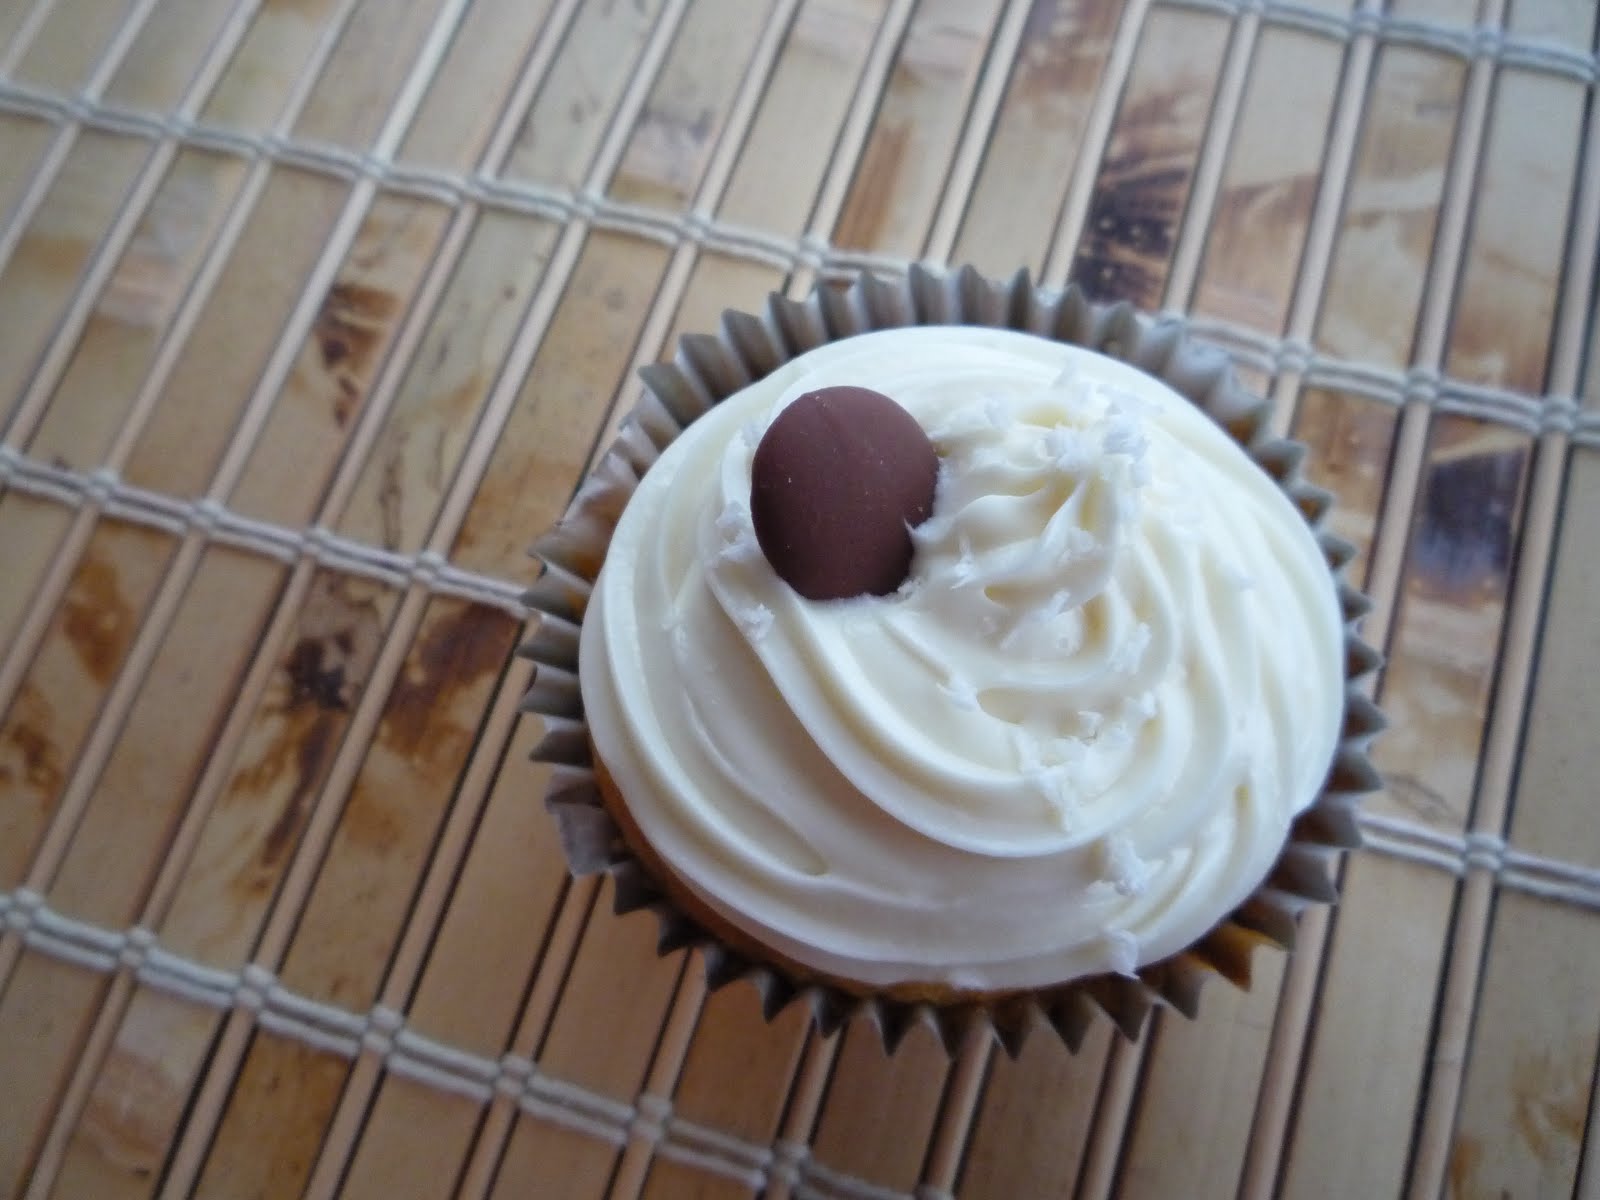
I did my research and came across a simple recipe from goodtoknow.co.uk. I made my own vanilla, buttercream frosting and added some lemon zest and a drop of lemon juice for a tasty combination. They went down a treat, so much so that for her anniversary, my boss asked if i could repeat the effort and make some for her husband!
This time round it was plain vanilla buttercream frosting, some with a little pink added for that loving feeling! (See my pictures for the results.) Yum!
For the cupcakes
125g (4oz) butter, melted
125g (4oz) caster sugar
125g (4oz) gluten-free self-raising flour
2 medium eggs
3tbsp milk
Few drops of vanilla extract
I doubled this recipe to make sure I had plenty to go around!
Set the oven to gas mark 5 or 180°C.
To make the cupcakes: Pour the melted butter into a bowl and add sugar, flour, eggs, milk and vanilla extract. Beat the mixture, preferably with an electric hand whisk, to give a smooth batter which may appear a little runnier than a usual sponge-cake mixture. Spoon mixture into the paper cases in the bun tray. Bake cakes in the centre of oven for 18-20 mins, or until they've risen and are light golden. Remove tray from the oven and leave cakes to cool for a few minutes, then transfer to a wire rack to cool completely.
Friday, 10 February 2012
Iconic Bride

Monday, 6 February 2012
Save the Date

Sunday, 5 February 2012
Skin logo

I'm proud to share a re-brand design for SKIN beauty & day spa (Te Awamutu) by our creative team at DESIGN ON Q
Nutella - Banana Ice Cream

This seems so simple and wonderful, I have to try it...
Nutella Ice Cream
Ingredients
1 cup of Nutella
6 Bananas
That’s it. You can add cinnamon or cocoa powder if you want but it isn’t needed. Throw the two ingredients into a blender or food processor and blend till very smooth. Pour into Freezer safe container (or posicle forms, I recommend small, the ones I used hold a little over 1/3 cup). Impatiently wait for it to freeze then devour.
re-blogged via sweepmeup and cleverlikewhoa


Saturday, 4 December 2010
Festive Fruit Brownies


I love a good mince pie and I love a good brownie too, so when I came across this GENIUS idea from the Christmas edition of Delicious magazine, I was overcome with festive joy!
This is a cross breed of fruity, festive-ness and gooey chocolate-ness. In a word...YUM!
I slightly adapted the original recipe to my own taste, adding a little less sugar and butter and a little more mincemeat and I think it worked really well.
The results are best scoffed down warm with an ice cold glass of milk on hand...I might have to make more and leave one out for Santa, then he'll definately get me that iPad for being a good girl, right?!
Festive Fruit Brownies
200g dark chocolate - chopped
250g soft brown muscovado sugar
200g unsalted butter
4 large free range eggs
200g plain flour
1/4 tsp baking powder
35g cocoa powder
100g mincemeat
1 tsp mixed spice
1 tsp cinnamon
80g chopped mixed nuts
Preheat your oven to 180ºC or 160ºC for a fan oven. Grease a 22cm square cake tin and line the base with baking paper.
Put the chopped chocolate, sugar and butter in a pan over a low heat. Stir until melted and combined. Remove from the heat, then pour into a bowl to cool slightly. Mix in the beaten eggs thoroughly.
Add the flour, baking powder, cocoa, mincemeat, mixed spice, cinnamon and nuts, stirring gently to combine.
Spread the mixture into the tin and bake for 25 minutes or until just set.
Cool in the tin, then dust with icing sugar for a snowy effect. Cut into squares and indulge straight away, I insist!
Saturday, 6 November 2010
Coffee-Choc Shortbread


I miss Australia.
More to the point, I miss the sun. Winter is officially setting in and although it's nice to be back in my homeland, it's crappy being back in it's climate!
Alas, I am not here to diss Scotland, it is a beautiful place with so many great things about it, even when it's pouring rain and blowing a freakin' gale! And, in my opinion, the best product of Scotland is shortbread...mmm, crumbly, sweet and deeeeeeeeelicious! Yes, whiskey is up there on the list of greatness too but i don't know how to make that from scratch!
If anything can make me feel warmer and more appreciative to be home shortbread can.
Now for the recipe. I didn't want to make just any shortbread, it's actually very versatile so I began by going through my favourite baking blogs and found this little diamond of an idea on Smitten Kitchen.
This is a fantastic and simple recipe which Deb, the blog author, adapted from an American cookbook. She uses a very clever technique of rolling out the dough in a plastic bag, very cool and clean! All I have changed are the American weights and measurements so that us Scots/Brits can give it a go.
Pay special attention to the last instruction about the cookies being a pale colour, I baked mine for a minute too long and feel they lost a little of their flavour, my bad! I will definately try again though because even slightly overdone they taste fab.
Mmm...home sweet home! Give it a go if you like:
1 tablespoon instant espresso powder
1 tablespoon boiling water
8 ounces unsalted butter, at room temperature
2/3 cup icing sugar
1/2 teaspoon pure vanilla extract
2 cups all-purpose flour
4 ounces bittersweet chocolate, finely chopped,
or 3/4 cup store-bought mini chocolate chips
1. Dissolve the espresso in the boiling water, and set aside to cool to tepid.
2. Working with a stand mixer, preferably fitted with a paddle attachment, or with a hand mixer in a large bowl, beat the butter and confectioners’ sugar together on medium speed for about 3 minutes, until the mixture is very smooth. Beat in the vanilla and espresso, then reduce the mixer speed to low and add the flour, mixing only until it disappears into the dough. Don’t work the dough much once the flour is incorporated. Fold in the chopped chocolate with a sturdy rubber spatula.
3. Using the spatula, transfer the soft, sticky dough to a gallon-size zipper-lock plastic bag. Put the bag on a flat surface, leaving the top open, and roll the dough into a 9 x 10 1/2 inch rectangle that’s 1/4 inch thick. As you roll, turn the bag occasionally and lift the plastic from the dough so it doesn’t cause creases. When you get the right size and thickness, seal the bag, pressing out as much air as possible, and refrigerate the dough for at least 2 hours, or for up to 2 days.
4. Position the racks to divide the oven into thirds and preheat the oven to 170 degrees C. Line two baking sheets with baking paper.
5. Put the plastic bag on a cutting board and slit it open. Turn the firm dough out onto the board (discard the bag) and, using a ruler as a guide and a sharp knife, cut the dough into 1 1/2-inch squares. Transfer the squares to the baking sheets and carefully prick each one twice with a fork, gently pushing the tines through the cookies until they hit the sheet.
6. Bake for 15 to 20 minutes, rotating the sheets from top to bottom and front to back at the midway point. The shortbreads will be very pale–they shouldn’t take on much color. Transfer the cookies to a rack.
Sunday, 24 October 2010
Double Chocolate Banana Loaf


This thing is richer than Oprah!
If, like me, you love banana bread but feel it could benefit from a super-charge of chocolate power then this is the recipe for you!
I tried this out yesterday and think I'm still on a chocolate high. I found the recipe on the fabulous Joy the Baker blog a while ago but havn't had a chance to try it until now. Because I'm living at home while I figure out my life I have a lot of time on my hands and I get to take advantage of all my Mum's baking gadgets...SWEET!
Like i said, it's a full on chocolate experience with just a hint of banana flavour, almost like a brownie really, yum. Next time I bake it I think I'll substitute half of the cocoa powder for more plain flour to mellow it out a little...I know, I'm a wuss!
It's a really easy recipe to follow, all I've done to the recipe is convert some of the weights to UK instead of American style.
2 cups plain flour
1 cup cocoa powder
1 1/2 teaspoons baking powder
1/2 teaspoon salt
1/4 teaspoon baking soda
1 stick (4oz) unsalted butter, at room temperature
3/4 cup sugar
1/2 cup (packed) light brown sugar
2 large eggs
2 ripe bananas, mashed
3/4 cup buttermilk
3 ounces bittersweet chocolate, coarsely chopped
Center a rack in the oven and preheat the oven to 350 degrees F. Butter a 9×5 inch loaf pan and place it on an insulated baking sheet or on two regular baking sheets one on top of the other. This extra insulation will keep the bottom of the bread from overbaking.
Sift together the flour, cocoa, baking powder, salt ad baking soda.
Working with a stand mixer with a paddle attachment, or with a hand mixer in a large bowl, beat the butter at medium speed for about a minute until soft. Add the sugars and beat for 2 minutes more. Add the egs one at a time, beating for a minute after each addition. At this point , the batter may look a little curdled- it’s ok. Reduce the mixer speed to low and mix in the mashed bananas. Add the dry ingredients in three additions, mixing only until they disappear into the batter. Still on low sweep, add the buttermilk, mixing until it is incorporated. Stir in the chopped chocolate. Scrape batter into prepared pan.
Bake for 3o minutes. Cover the bread loosely with a foil tend to keep the top from getting too dark, and continue to bake for another 40-45 minutes (total baking time is between 70 and 75 minutes), or until a thin knife inserted into the center comes out clean. Transfer the pan to a rack and cool for at least 20 minutes before running a knife around the edges of the bread and unmolding it. Invert and cool to room temperature right side up.
Saturday, 23 October 2010
It's been a while...




Hello stranger! Yes, I'm talking to my blog...it's been a wee while since we spoke, 9 whole months in fact. So what's been happening? I've been very busy with travels and work in Australia...poor me eh! Well I'm back now and ready to fill you in on my adventures.
So the last time I was in touch I was looking for some creative/design/art direction work in Perth. Well, that didn't happen. I knocked on lots of agency doors and sent many annoying emails but alas there were no jobs for Rhona. So that got me thinking and I decided to expand my work search beyond the city of Perth, to the Aussie Outback, and that is how I ended up at the Capricorn Roadhouse.
Now, I had never considered that a roadhouse would be a great place to make money but they are awesome! You are completely isolated in an outback area so you have nothing to spend your hard earned cash on, and believe me, it's very hard earned. It's long hours involving anything from pouring "scooners" at the bar to washing dishes or flippin' burgers at the grill. I LOVED IT! The money was fantastic ($21 an hour, around £15!) which payed for the rest of my travels and more.
The job was "live-in" which brought its own challenges. There were around 20 staff coming and going on a weekly basis, imagine Big Brother in the outback and you're getting there! But the highs always beat the lows as we were surrounded by some amazing scenery and even more amazing characters. Good times!
I have put up a few pics to help set the scene, a couple were taken on an awesome microlite flight which cost me a carton of beer!
Now I'm back home in Scotland and deciding what to do next. Onwards and upwards...I'll be in touch...promise!
Tuesday, 5 January 2010
The land of Oz


It's been three months, three awesome months so far!
I arrived in Perth, Western Australia, 12 weeks ago with two bags of clothes and bags of nerves and exitement. Two good friends met me at the airport with massive smiles and a beautiful bunch of flowers and I started to cry immediately! The tears, I later realised, were for the friends and family I had left at home but also for the happiness and freedom I suddenly felt at entering this new era of my life. i am literally young, free and single. The possibilities are endless.
So far I have travelled up and down the west coast with new and old friends. I have snorkelled with reef sharks, slept under the stars at a cattle station, sung around a campfire, "surfed" Wave Rock, visited temples in Bali and sampled plenty of gorgeous wines in Margaret River and Swan Valley.
I have also completely run out of money in the process, so now it's back to reality to find a job, which is never an easy task wherever you are.
When I set out on this new adventure I left a very stable job with a very decent wage...some would say I'm nuts, others would say "go for it!". I wasn't creatively satisfied and had very itchy feet so I thought with my guts instead of my head and quit without ever looking back. Recently I've been in that scary, unemployed stage where it's very easy to lose hope. We've all been there right? But with this new year I'm feeling confident again and have decided not to wollow or feel sorry for myself, I made this decision...and it's an awesome one! I can't wait to be creative here and settle into life in Perth.
I'll be in touch again with news and stories of my goings on down under but for now I'll leave you with some images from my trip so far, to inspire you...and me!
Friday, 18 September 2009
Thank You Brownies


Thank you, thank you, thank you!
This post is dedicated to the genius of Mr. Steve Milne, the man who brought my new website to life. What better way for me to repay him than with an orgy for the mouth...BROWNIES!
As I have mentioned before I am heading for a new challenge in Australia and needed a website to show off my work to potential employers out there. Steve stepped up and put his web building skills to work for me, knowing that i could not pay him a penny...in the words of Salt n' Peppa..."Whatta man, whatta man, whatta mighty good man!"
I had to find a recipe that would be worthy of such goodness and decided that you can't go wrong with a rich, gooey brownie. I have wanted to try out a recipe from Deb at Smitten Kitchen for ages and took this as a great opportunity. She did not let me, or Steve, down! these were the greatest tasting brownies EVER.
Please try them out, you won't regret it, they are best devoured with a glass of cold milk...yum! And please check out my new website!
Here is the recipe from Smitten Kitchen, the measurements are american but i have added a snazzy new tool to my blog that will convert them for you in seconds.
Classic Brownies
Adapted from Cook’s Illustrated
Be sure to test for doneness before removing the brownies from the oven. If underbaked (the toothpick has batter clinging to it) the texture of the brownies will be dense and gummy. If overbaked (the toothpick comes out completely clean), the brownies will be dry and cakey.
1 cup (4 ounces) pecans or walnuts, chopped medium (optional)
1 1/4 cups (5 ounces) cake flour
1/2 teaspoon salt
3/4 teaspoon baking powder
6 ounces unsweetened chocolate, chopped fine
12 tablespoons (1 1/2 sticks) unsalted butter, cut into six 1-inch pieces
2 1/4 cups (15 3/4 ounces) sugar
4 large eggs
1 tablespoon vanilla extract
1. Adjust oven rack to middle position; heat oven to 325 degrees. Cut 18-inch length foil and fold lengthwise to 8-inch width. Fit foil into length of 13 by 9-inch baking dish, pushing it into corners and up sides of pan; allow excess to overhand pan edges. Cut 14-inch length foil and, if using extra-wide foil, fold lengthwise to 12-inch width; fit into width of baking pan in same manner, perpendicular to first sheet. Spray foil-lined pan with nonstick cooking spray.
2. If using nuts, spread nuts evenly on rimmed baking sheet and toast in oven until fragrant, 5 to 8 minutes. Set aside to cool.
3. Whisk to combine flour, salt, and baking powder in medium bowl; set aside.
4. Melt chocolate and butter in large heatproof bowl set over saucepan of almost-simmering water, stirring occasionally, until smooth. (Alternatively, in microwave, heat butter and chocolate in large microwave-safe bowl on high for 45 seconds, then stir and heat for 30 seconds more. Stir again, and, if necessary, repeat in 15-second increments; do not let chocolate burn.) When chocolate mixture is completely smooth, remove bowl from saucepan and gradually whisk in sugar. Add eggs on at a time, whisking after each addition until thoroughly combined. Whisk in vanilla. Add flour mixture in three additions, folding with rubber spatula until batter is completely smooth and homogeneous.
5. Transfer batter to prepared pan; using spatula, spread batter into corners of pan and smooth surface. Sprinkle toasted nuts (if using) evenly over batter and bake until toothpick or wooden skewer inserted into center of brownies comes out with few moist crumbs attached, 30 to 35 minutes. Cool on wire rack to room temperature, about 2 hours, then remove brownies from pan by lifting foil overhang. Cut brownies into 2-inch squares and serve. (Store leftovers in airtight container at room temperature, for up to 3 days, or, ahem, in the freezer until your resistance gets the better of you.)
Wednesday, 9 September 2009
Comforting Carrot Cake


So, it seems that Autumn has arrived, too quickly for my liking. But considering Scotland had a dismal summer it is actually quite nice to move on, get over it and enjoy the benefits of colder days and darker nights; comfort food!
When I decided to bake my first carrot cake it was on one of those days, leaves started being blown off the trees in the park that my lounge window looks on to and it just felt like i needed a warm hug in the form of food. The flavours of spice in a good carrot cake always deliver on this and the frosting would put a smile on the most miserable face!
Here is my first go, it's a mongrel of two recipes. The cake i adapted from Joy The Baker and the cream cheese frosting is from the delicious magazine website. have a go...it will warm your wee souls!
Ingredients:
4 cups peeled and finely grated carrots
3 large eggs, room temperature
2 cups golden caster sugar
1 1/2 cups vegetable oil
1/3 cup buttermilk
1 1/2 teaspoons pure vanilla extract)
1 cup walnuts or pecans, toasted and finely chopped
1/2 cup sweetened shredded coconut
3 cups all-purpose flour
2 teaspoons baking powder
1 teaspoon baking soda
1 teaspoon salt
1 teaspoon ground cinnamon
Orange Cream Cheese Frosting
25g olive oil spread
300g half-fat cream cheese
25g unrefined golden icing sugar
1 orange
1. Preheat oven to 180 degrees celcius. Grease with butter, then line a standard square tin with baking paper. In a bowl, whisk together carrots, eggs, sugar, oil, buttermilk, vanilla, and coconut, and nuts if desired. In another bowl, whisk together flour, baking powder, baking soda, salt, and cinnamon. Stir flour mixture into carrot mixture until well combined.
2. Pour the batter into the lined baking tin and cook in the preheated oven for 40-45 minutes. To check if it is thoroughly cooked, take a knife or skewer and put it into the middle of the cake. It should come out clean, if there is some batter on it, put the cake back into the oven for a further 5 mins and check again until cooked.
3. remove the cake from the tin and place on a cooling/wire rack for at least 20minutes before frosting.
4. Smother the cake with the orange cream cheese frosting and enjoy!
Frosting
Put the olive oil spread and cream cheese into a bowl. Mix until soft and smooth. Put a sieve over the bowl and add the icing sugar, pushing it through with a spoon. Rub the orange against the fine side of a grater, stopping when you get to the white pith. Add half the zest to the bowl, mix, then spread over the cake. Sprinkle the rest of the zest over the cake and cut it into 12 squares.
Sunday, 30 August 2009
Banana Breakfast Muffins


When it comes to treats, this is as healthy as I get.
Breakfast is a tough one. I grew up demanding Coco Pops and on the rare occasion my parents actually gave in, it turns out my Dad would usually munch it all before his three children got the chance! Now as an "adult", capable of making my own decisions with my own money, I find myself torn between choosing a healthy, sustaining start to my day or a tasty, sugar filled, and more to the point, enjoyable one!
I try to mix it up; as we are told we should, balanced diets are the best right? Some days it's porridge, some it's whole-wheat toast and peanut butter, others it's not so good because as we all know a hangover only goes away after a greasy bacon roll.
Recently I have been going for bran cereals with slices of banana as a good option but more often than not the jar of Nutella in my cupboard wins and it's a chocolate fest leaving me with a few spare bananas to use up. And so to the Banana Muffins. These make a good addition to the breakfast list and are an even better 11am snack. I have tried to put in as little sugar as possible but let's face it; they wouldn't be as good without it!
Ingredients:
Butter for greasing the muffin pan
3 very ripe bananas
120g golden caster sugar
3 tbsp milk
3 tbsp vegetable oil
1 tsp vanilla essence
1 tsp ground cinnamon
1 free-range egg
1tsp baking powder
250g self-raising flour
1. Preheat your oven to 180 degrees. Grease the muffin tin with the butter.
2. Put the bananas in a large bowl and mash with a potato masher until fairly smooth.
3. Crack your egg into the bananas and add in the milk, vanilla, cinammon and oil. Mix together well.
4. In another bowl, sift the flour and baking powder together, then add the sugar to this. Pour the banana mixture in and stir until mixed. (don't over stir though!)
5. Spoon the mixture into the holes in the greased holes in the miffin tin and sprinkle some pumpkin and sunflower seeds on top. Bake in the oven for around 20 minutes. Check that they are cooked by putting a skewer or knife into the centre of one. If it comes out clean, they are done. leave to cool on a rack for 10 minutes then enjoy!
These are tasty and very easy to make. I have found they are great on their own or even better halved with either jam or Nutella spread on top! Enjoy.
Subscribe to:
Posts (Atom)